Multi-Configuration Robotics Platform
Rebuild one MIEO into several Pro robots with one program
What you'll build
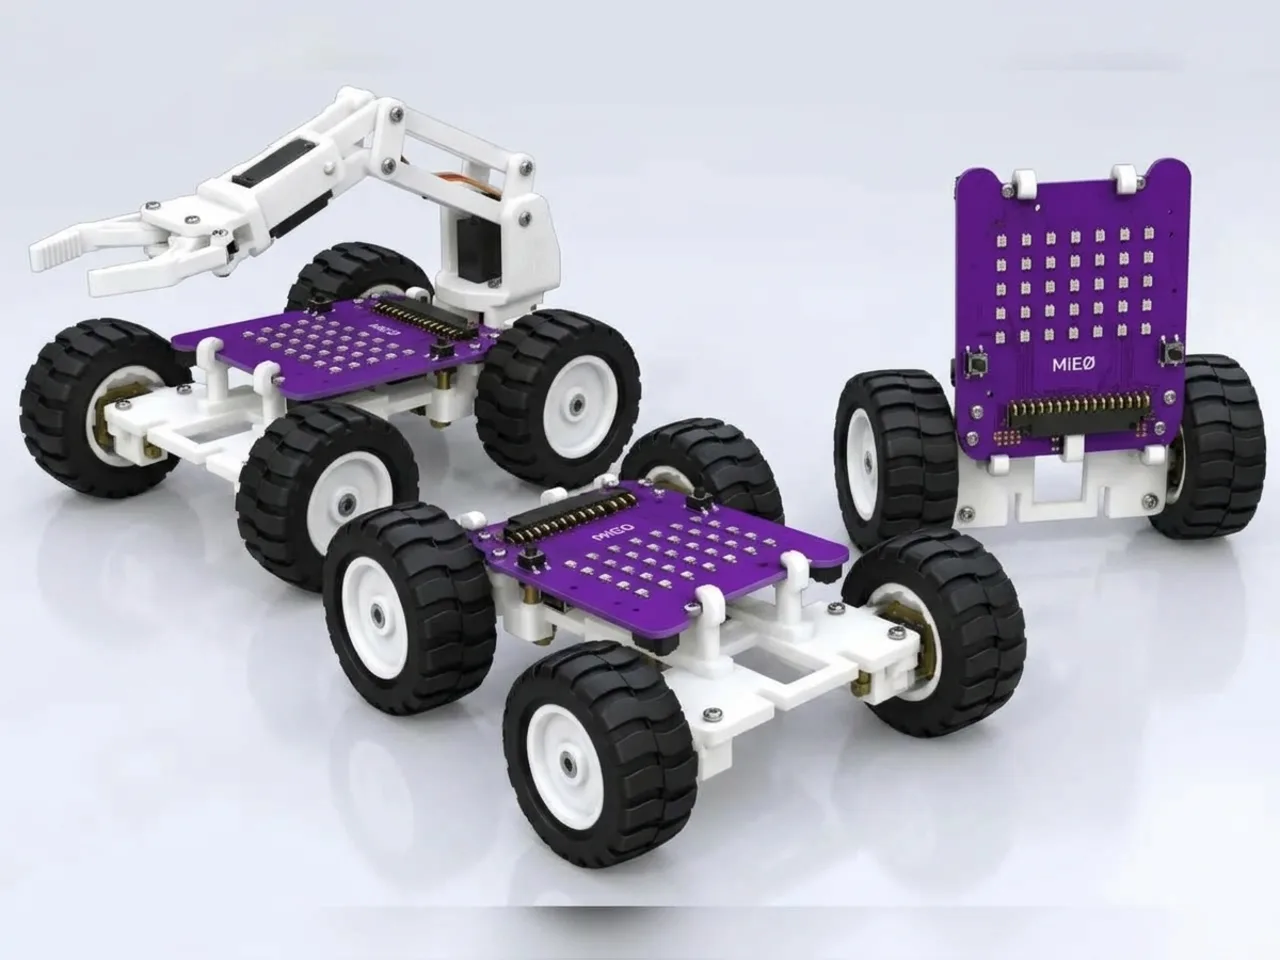
The big idea of Mieo Pro is that the board, its sensors and your coding skills stay the same while the machine around them changes. This final project shows it off. You write one program with three jobs, each started from its own touch pad: T1 drives the rover round a square, T2 works the gripper arm, and T3 makes the upright robot dance. Then you rebuild MIEO three times and run the job that matches each build. The “set robot orientation” block keeps forward meaning forward when the board stands up.
What you'll learn
- Reusing one program across different robot builds
- How “set robot orientation” makes forward still mean forward when the board is turned on its side
- Organising a program into separate jobs, each with its own trigger
- How engineers design one product that becomes many machines
You'll need
- Mieo board
- Two N20 motors and their wheels
- Battery
- 3D-printed mountings
- Caster wheel
- Screws and screwdriver
- Two servo motors, from the MIEO kit
- Rover, gripper arm and upright body parts, from the Mieo Pro kit
- A USB cable, or Bluetooth on your computer
- The Robolab app (free)
Stay safe
- Ask an adult to help with the small screws.
- Lift MIEO's wheels off the table before you upload a driving program, so it can't drive off the edge.
- Plug extra parts only into the connector this page names. Wiring a part to the wrong connector can damage it for good.
Build it
- Upload the program below first, while MIEO is still in one piece. It stays on the board through every rebuild.
- Build 1, the rover: build it as in Gamepad Controlled Robot, with the board lying flat.
- Build 2, the gripper arm: rebuild MIEO as in Gripper Pick-and-Place Robot, with the gripper servo in S1 and the arm servo in S2.
- Build 3, the upright robot: rebuild MIEO standing up, as in Dancing Robot, so the board is on its side.
- Between builds, always switch MIEO off before you unplug or move anything.
Code it
- Open Robolab, choose Mieo, connect and set the switch at the top right to Upload. Start with “when mieo starts up” and “show think”, then a “forever” loop.
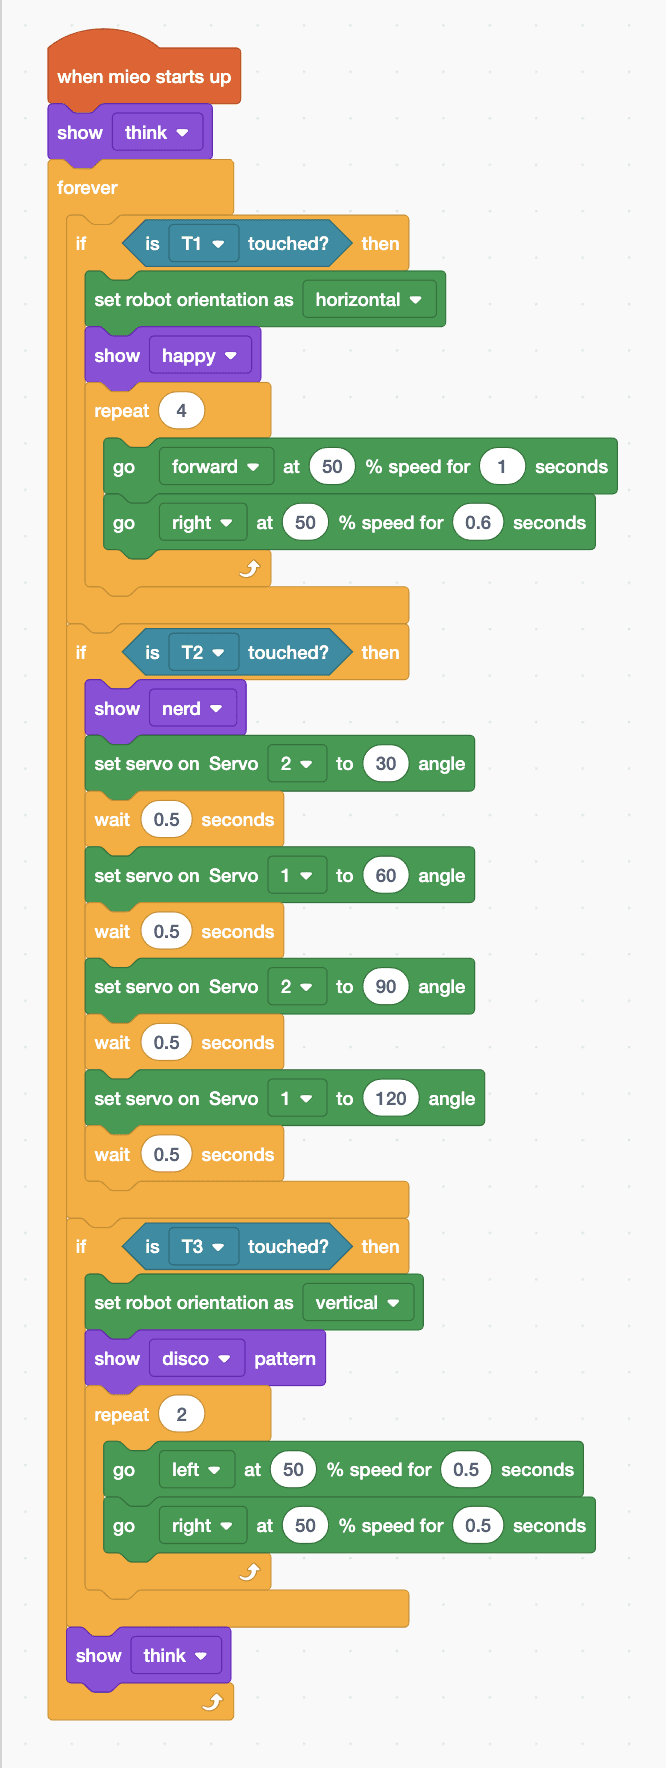
- Job 1, “if is T1 touched? then”: “set robot orientation as horizontal”, “show happy”, then “repeat 4” with “go forward at 50 % speed for 1 seconds” and “go right at 50 % speed for 0.6 seconds” inside. That's a square.
- Job 2, “if is T2 touched? then”: “show nerd”, then the gripper's moves from Gripper Pick-and-Place: arm down (Servo 2 to 30), close the gripper (Servo 1 to 60), arm up (Servo 2 to 90) and open it again (Servo 1 to 120), with “wait 0.5 seconds” between each.
- Job 3, “if is T3 touched? then”: “set robot orientation as vertical”, “show disco pattern”, then “repeat 2” with “go left at 50 % speed for 0.5 seconds” and “go right at 50 % speed for 0.5 seconds”.
- After the three jobs, still inside the loop, add “show think”.
- Lift the wheels and upload. Then build each robot in turn and touch its pad.
Upload mode: Robolab turns your blocks into MicroPython and sends them to MIEO over USB or Bluetooth. MIEO then runs the program by itself, even after you unplug it.
when mieo starts up
show [think v]
forever
  if <is [T1 v] touched?> then
    set robot orientation as [horizontal v]
    show [happy v]
    repeat (4)
      go [forward v] at (50) % speed for (1) seconds
      go [right v] at (50) % speed for (0.6) seconds
    end
  end
  if <is [T2 v] touched?> then
    show [nerd v]
    set servo on Servo [2 v] to (30) angle
    wait (0.5) seconds
    set servo on Servo [1 v] to (60) angle
    wait (0.5) seconds
    set servo on Servo [2 v] to (90) angle
    wait (0.5) seconds
    set servo on Servo [1 v] to (120) angle
    wait (0.5) seconds
  end
  if <is [T3 v] touched?> then
    set robot orientation as [vertical v]
    show [disco v] pattern
    repeat (2)
      go [left v] at (50) % speed for (0.5) seconds
      go [right v] at (50) % speed for (0.5) seconds
    end
  end
  show [think v]
endSee the MicroPython
# generated by Robolab
import mieo

mieo.showemotion('think')
while True:
  if mieo.touched('T1'):
    mieo.setrobotorientation('horizontal')
    mieo.showemotion('happy')
    for count in range(4):
      mieo.run('forward', 50)
      mieo.sleep(1 * 1000)
      mieo.stoprobot()
      mieo.run('right', 50)
      mieo.sleep(0.6 * 1000)
      mieo.stoprobot()
  if mieo.touched('T2'):
    mieo.showemotion('nerd')
    mieo.setservo('S2', 30)
    mieo.sleep(0.5 * 1000)
    mieo.setservo('S1', 60)
    mieo.sleep(0.5 * 1000)
    mieo.setservo('S2', 90)
    mieo.sleep(0.5 * 1000)
    mieo.setservo('S1', 120)
    mieo.sleep(0.5 * 1000)
  if mieo.touched('T3'):
    mieo.setrobotorientation('vertical')
    mieo.showpattern('disco')
    for count in range(2):
      mieo.run('left', 50)
      mieo.sleep(0.5 * 1000)
      mieo.stoprobot()
      mieo.run('right', 50)
      mieo.sleep(0.5 * 1000)
      mieo.stoprobot()
  mieo.showemotion('think')
Test it
As the rover, touch T1: MIEO smiles and drives round a square, ending about where it started. As the gripper arm, touch T2: the arm lowers, the gripper closes, the arm lifts and the gripper opens. As the upright robot, touch T3: disco lights flash while MIEO wiggles left and right. Between jobs, MIEO shows its thinking face and waits.
If it doesn't work
- The upright robot drives backwards? Make sure job 3 starts with “set robot orientation as vertical”, and that the board stands the way the build guide shows.
- The square doesn't close? Change the 0.6 seconds of turning until each corner is a quarter turn.
- A touch starts the wrong job? Check each if block names the right pad, and touch only one pad at a time.
Make it your own
- Easy: change each job's face and add a sound, so you can tell the builds apart with your eyes shut.
- Medium: add a fourth build and job on T4, such as the forklift from Warehouse Picker Robot.
- Hard: design your own Mieo Pro build, sketch it first, then add a job for it to the program.